How to add/integrate WhatsApp to WordPress Website
This is the era of mobile usage. Mobile is on the wheels everywhere. You can imagine a day without mobile. Every application you designed has to be mobile-friendly. It is not a pontification but a true. According to research, Mobiles are beating the internet while there are 91% of online users are communicating and socializing through mobiles.
Hence it is not an exaggeration to say that mobile apps like WhatsApp occupied the front seat. WhatsApp in the present day is ruling the world with 600 million users and above.
In today’s post let’s unravel the truth by knowing the procedure for integrating WhatsApp with WordPress website and maximize the engagement level. Thus making it easy for readers to share their useful content.
But before dwelling further do you know what’s and why’s of WhatsApp? It is very important to know about it without any delay.
Importance of WhatsApp
It is a messenger app that is free to download on smartphones. It uses Wi-Fi to send messages, audio/Video files, images and documents. The cost of this is very less as it is supported by the internet. You only need to pay internet charges. Nowadays, WhatsApp on a desktop is also gaining traction. Just scan the QRCode from the mobile and use it. It is popular not only among millennials or GenZ users but also Adults are using it for their own benefits. They are many attractive features available like voice messages, group chatting, location sharing and more.
WhatsApp is everywhere. By understanding everyone’s wish, it now has approximately 1.5 billion users globally in over 180 countries. There are 60 billion messages exchanged daily. When the internet is enabled, you can even make international calls. With all its feature you may have a conundrum with security. But you can be free of mind, as it is developed by Jan Koum and Brian Acton their prowess has been shown in terms of security also. Hence, it is hard to beat. Now the Facebook has beaten over WhatsApp. As a result, the content shared on the WhatsApp is more. In a short span of time, it has created a buzz around the world. Having said that, it is not at all pontifying but stating the fact according to the statistics and researches.
But having a WhatsApp on your website can grow the traffic and can reach it to your desired position. This plugin when installed can work wonders and useful for readers to share their favourite articles or posts and read them in real time. Moreover, the main benefit in sharing it using the WhatsApp plugin is that the messages are kept private.
Adding WhatsApp plugin
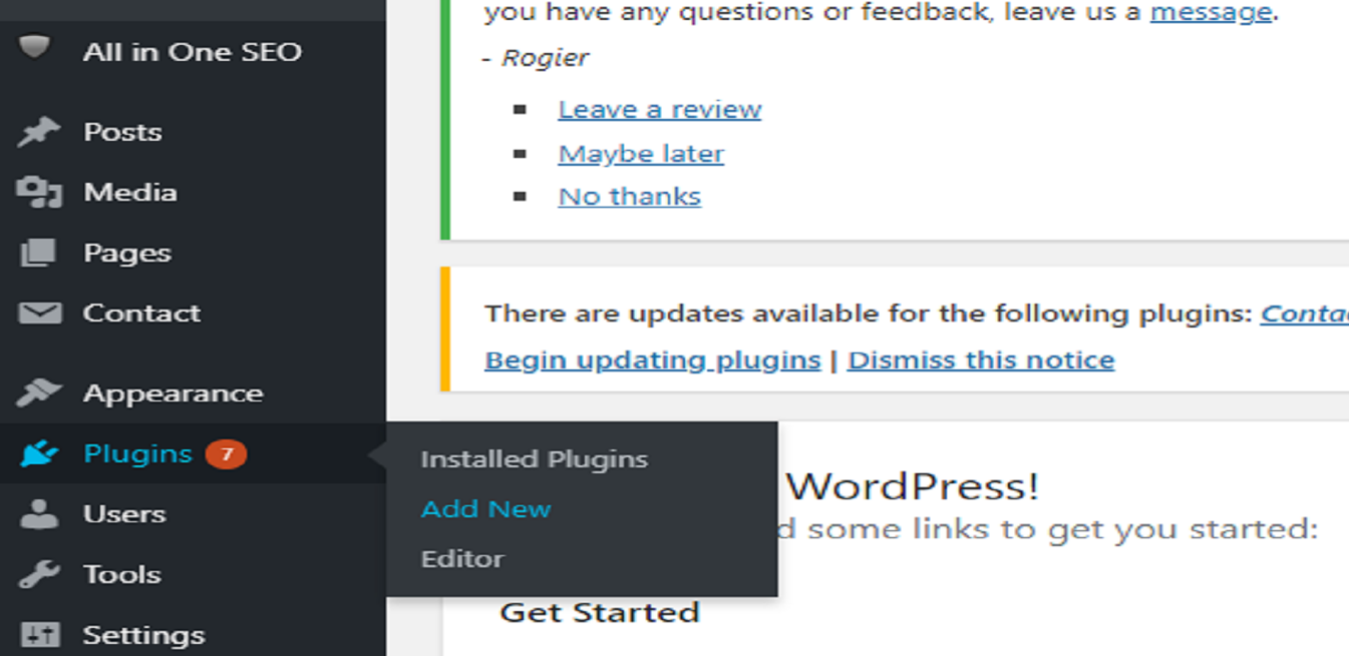
There are a couple of ways that you can set-up the WhatsApp plugin and integrate with WordPress. To install WhatsApp log-in to your WordPress account, and scroll down to “Plugins” there you will find three options
- Installed plugins
- Add new
- Editor
Click on add new options.
It will navigate to the next page where you find the new plugins and already existing plugins. These plugins are categorized into various tabs like
- Featured
- Popular
- Recommended
- Favourites
Alongside there is Keyword, Author, and tag dropdown menu. Choose the plugin you want to install. In this case, it is WhatsApp. After selecting the desired plugin, type and tap enter. It displays various options available under that WhatsApp. Select and activate it.
Step 2
After activating the plugin–click on the settings page from the admin dashboard. Plunge into action and do the necessary modifications. That’s it you are now ready with the WhatsApp. why waiting! share your content.
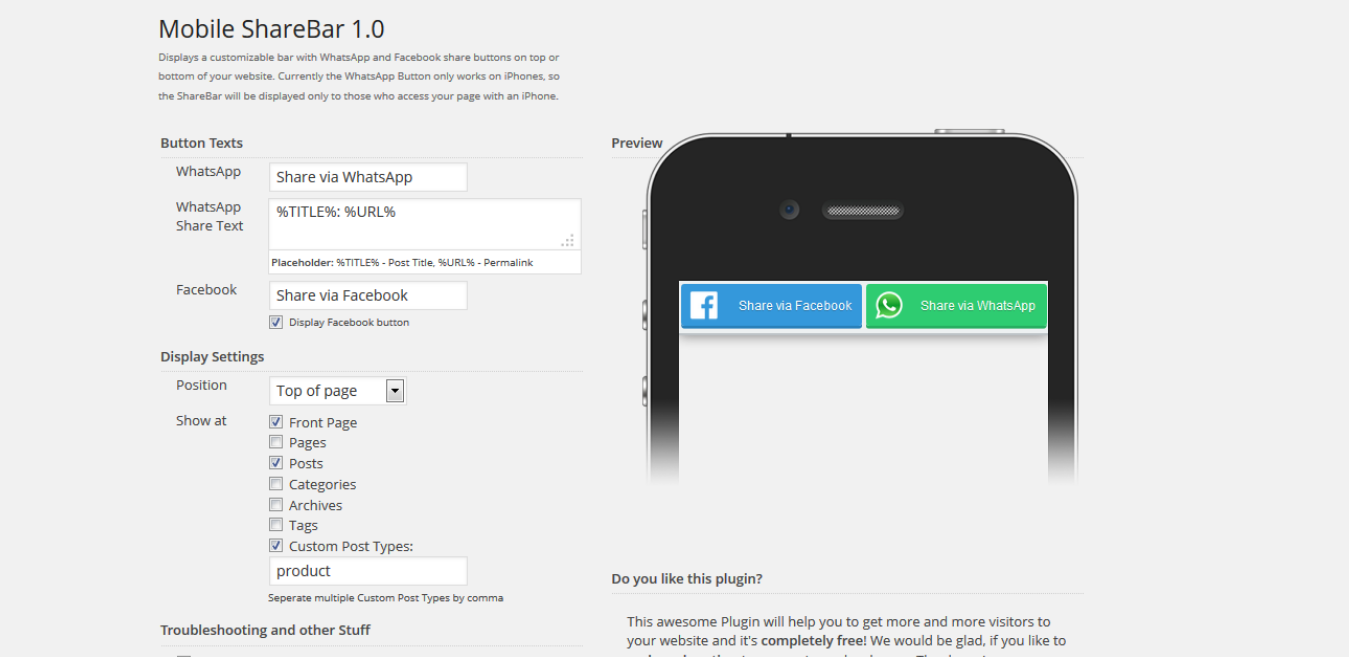
Using “Mobile share Bar” plugin
Install the plugin Mobile Share bar and activate it.
Switch to the settings page and configure the plugin. The configuration is quite simple. You can edit the text later as you desired. Along with WhatsApp, you can also activate Twitter and Facebook buttons. It is mandatory to install all the three and there is no way around to disable the other plugin’s. Once installed the buttons are automatically live. When the User clicks on the WhatsApp button, then it will straight away navigate to the shared post through WhatsApp API.
Complete the auto-pre filled message.
If you desire so, you can easily customize the message via settings. To do go to settings>>> Mobile ShareBar and modify the text. You can even use shortcodes and insert dynamic message for the posts’ title and URL.
Finally, save all the changes you have made and clear any cache. Over here you can even select where the icons have to display — Top, bottom, left, right centre. You can decide whether the icons will be on the landing page or in the subsequent pages.
With the help of the AddtoAny plugin
Install and activate the plugin. Go to settings and configure the AddtoAny plugin.
Choose either large or small icons and click “Add or remove services. You can add Facebook, Twitter or Google+ additionally along with this.
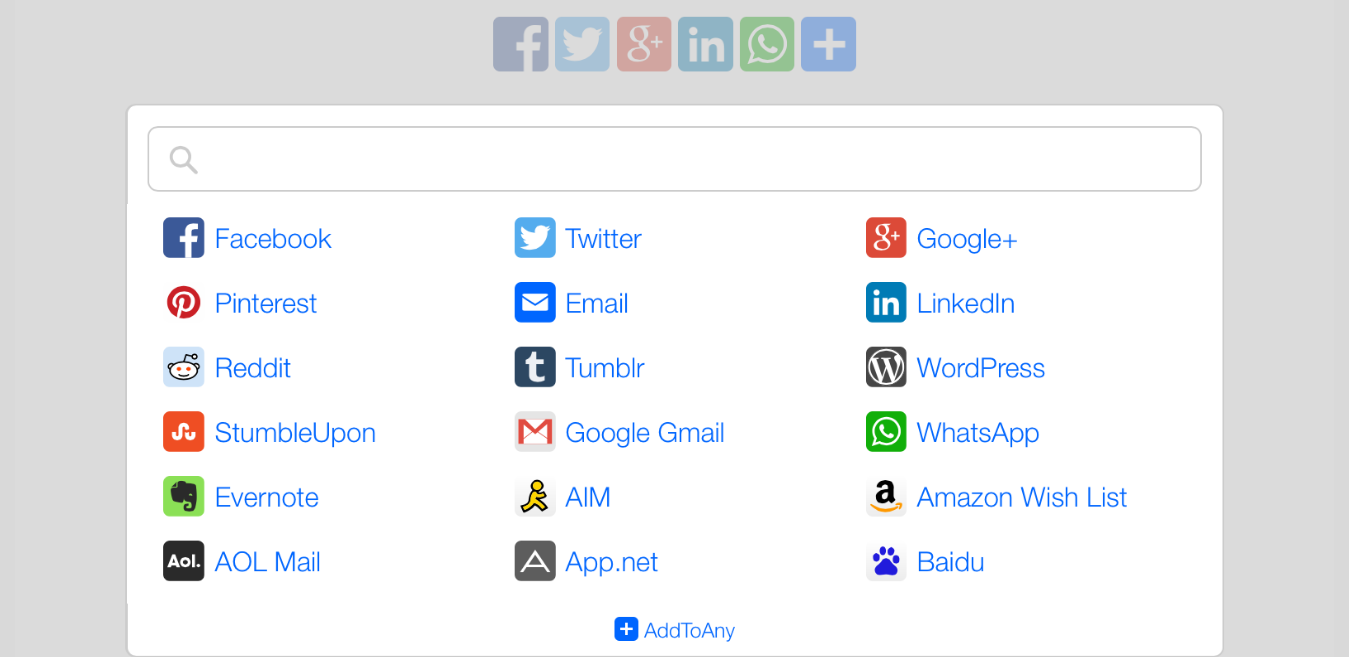
Scroll down to WhatsApp service and click and add WhatsApp. Configure display options. You can also set a floating share bar at the side of the page that can be visible wherever you are on the webpage.
Customize the icons to best suit your design of the website. Save the changes and check whether the WhatsApp switch is working or not. AddtoAny Plugin is integrated with Google Analytics, you can track the traffic through this analytics plugin.
WhatsApp hover icon
Add WhatsApp hover icon by using HTML code, at the footer of .php file.
If it is style.css add CSS code and Javascript code. Place this code wherever you want to display the icon. For instance, if the icon is displayed at the bottom, place this code at the footer.
![]()
If you are using CSS code and Javascript, it accepts only 720px screen size that is accessible for smartphones and tablet screen sizes.
Conclusion
WhatsApp, an instant delivery message has been growing its popularity and is available all over the world. It supports 50 languages. Now it is entering into your landing page or blog page. Your customers can easily converse with you through WhatsApp when it is integrated on your webpage. Set the WhatsApp with the above few steps and a Live Chat floating button on your website.


